Keeping track of significant changes in your website data is crucial for timely decision-making. Adobe Analytics offers Intelligent Alerts, a feature that automatically notifies you of important shifts in your metrics. This guide will walk you through setting up and using Intelligent Alerts to monitor your data effectively.
Understanding Intelligent Alerts
Intelligent Alerts use statistical models to detect anomalies in your data. They help you identify unexpected spikes, drops, or trends without the need to manually review reports constantly. By configuring these alerts, you can respond quickly to issues or capitalize on opportunities as they arise.
Step-by-Step Instructions
Step 1: Access Adobe Analytics
- Log In: Go to the Adobe Experience Cloud and sign in with your credentials.
- Navigate to Analytics: From the main dashboard, select Analytics.
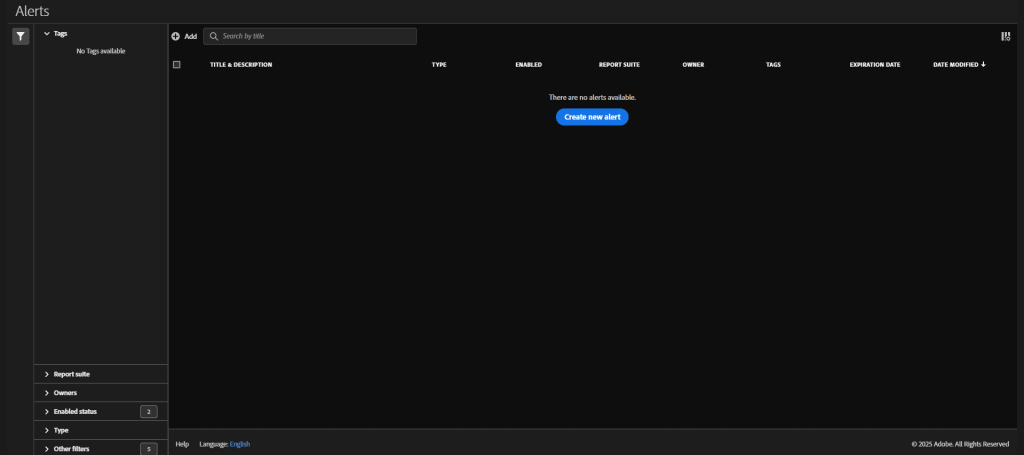
Step 2: Open the Alerts Manager
- Access Components: In the top navigation menu, hover over Components.
- Select Alerts: From the dropdown, click on Alerts to open the Alerts Manager.
Step 3: Create a New Alert
- Add Alert: Click the Create New Alert button to start creating a new alert.
- Choose Alert Type: Select Anomaly Detection Alert for an intelligent alert that uses statistical analysis.
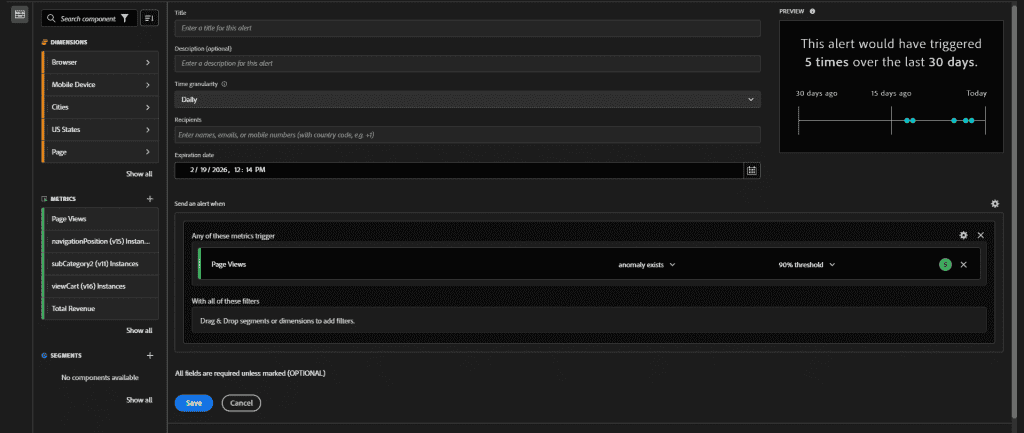
Step 4: Configure Basic Settings
- Name Your Alert: Enter a descriptive name, such as “Daily Revenue Alert”.
- Select Report Suite: Choose the appropriate report suite that contains your data.
- Define Timeframe:
- Frequency: Decide how often the alert should check for anomalies (e.g., hourly, daily).
- Time Period: Set the specific time period the alert should analyze.
Step 5: Specify Metrics and Dimensions
- Select Metrics: Choose the key metrics you want to monitor, like Revenue, Page Views, or Orders.
- Add Dimensions (Optional): If you wish to narrow down the alert, select dimensions such as Region, Product Category, or Marketing Channel.
Step 6: Set Anomaly Detection Parameters
- Adjust Sensitivity:
- Use the sensitivity slider to control how sensitive the alert is to deviations.
- Higher sensitivity captures smaller anomalies; lower sensitivity focuses on larger, more significant changes.
- Define Thresholds (Optional):
- You can set minimum or maximum values to trigger alerts for specific conditions.
Step 7: Configure Notifications
- Add Recipients: Enter the email addresses of those who should receive the alert.
- Customize the Message: Include a brief message to provide context for the alert.
- Select Notification Methods: Choose between email and, if available, SMS notifications.
Step 8: Review and Activate the Alert
- Double-Check Settings: Ensure all configurations are correct.
- Save the Alert: Click Save to activate the alert.
- Monitor Alerts: Keep an eye on your email or chosen notification method for alerts.
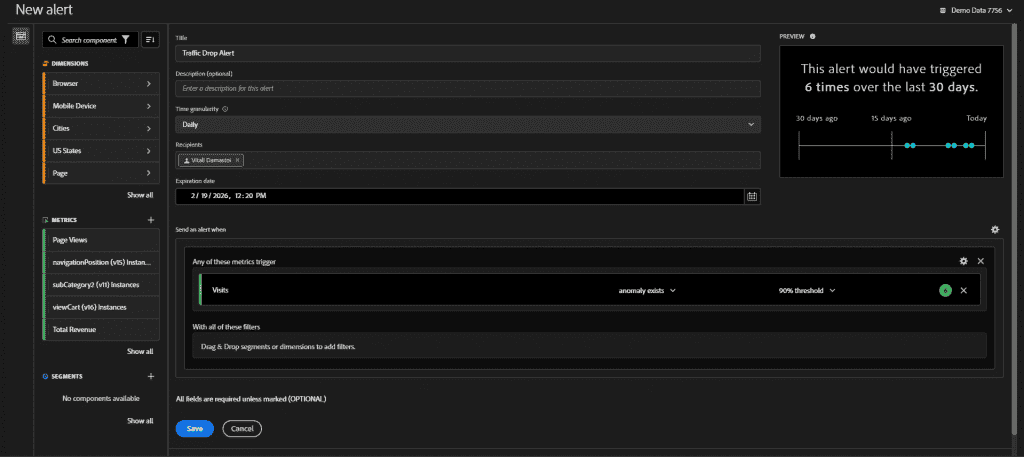
Example Use Case: Monitoring Sudden Drops in Traffic
Suppose you want to be notified if your website experiences an unexpected drop in daily traffic.
- Create an Alert Named: “Traffic Drop Alert”.
- Select Metric: Visits.
- Set Frequency: Daily.
- Adjust Sensitivity: Set to lower sensitivity to catch significant drops.
- Add Recipients: Include your web analytics team.
- Result: If daily visits drop sharply compared to historical data, the alert notifies your team to investigate potential issues like site outages or tracking errors.
Best Practices
- Focus on Key Metrics: Start with alerts for the most critical metrics that impact your business goals.
- Set Appropriate Sensitivity: Tailor the sensitivity to balance between too many false positives and missing important anomalies.
- Limit Alert Quantity: Avoid overloading with alerts; prioritize quality over quantity.
- Regularly Update Alerts: Review and adjust your alerts as your business needs change.
- Notify the Right People: Ensure alerts reach team members who can act on the information.
Common Mistakes to Avoid
- Setting Overly Sensitive Alerts: Extremely high sensitivity can result in frequent, unnecessary alerts that may lead to alert fatigue.
- Ignoring Time Zones: Make sure the alert schedule aligns with your operational hours.
- Missing Context in Notifications: Failing to provide context can make it hard for recipients to understand the alert’s significance.
- Forgetting to Test Alerts: Verify that alerts are working as intended by monitoring initial results.
- Not Acting on Alerts: Receiving alerts without following up negates their purpose.
Conclusion
Intelligent Alerts in Adobe Analytics help you stay informed about important changes in your data automatically. By setting up alerts tailored to your critical metrics, you can respond promptly to anomalies, mitigate risks, and seize opportunities. Implementing these alerts enhances your ability to make timely, data-driven decisions and keeps your team proactive.